Tuesday, March 27, 2012

Another project !


This is a first for me in a couple of ways.
Two projects in about a month; and, I used a circular saw and a drill.  I've used the sander before.
And this one was really construction and I did most of it myself!

One of my problems is that when I get something or an idea about something I go all out and want another one, or more.  Apparently, this happens with large items too.

Well, since there was another door at the same store for a good price, I just had to dream up another use for it.


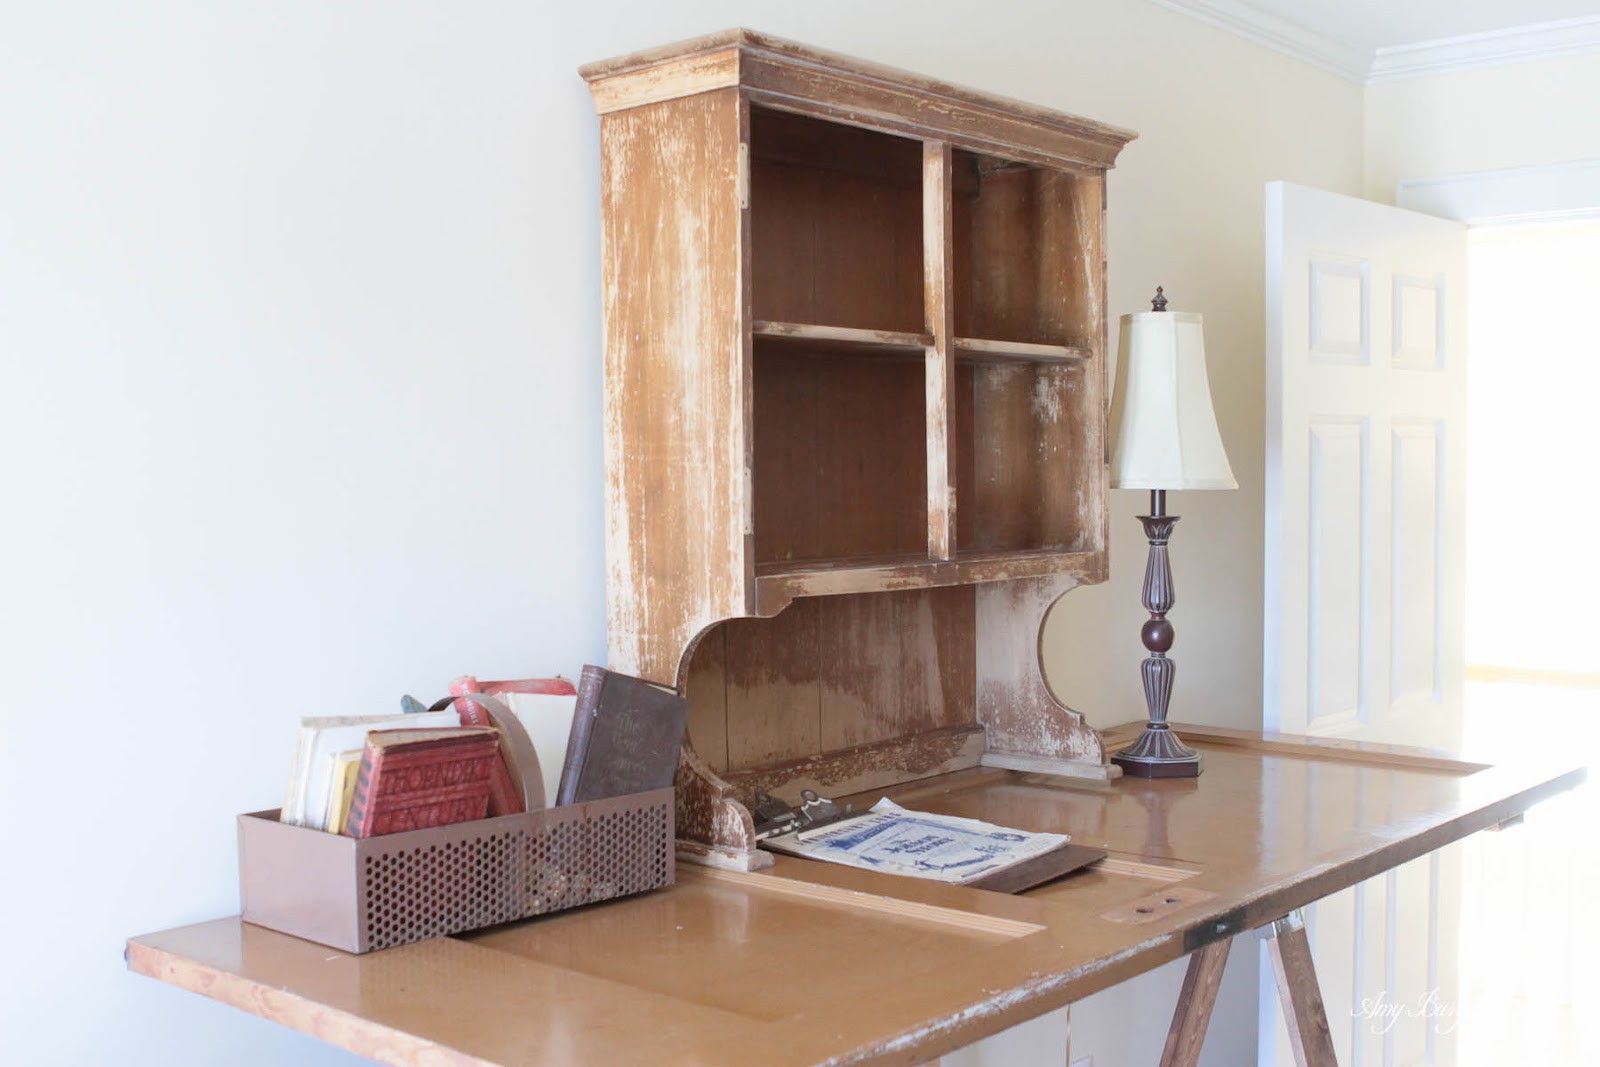
I plan to use it as a work table and I've put it in a spare bedroom.  I don't scrapbook much anymore since my son is grown, but I won't have an excuse anymore for other things.  I can use this instead of having junk all over the kitchen counter and table.  (The bedroom is upstairs, so we'll see how that works out.)


Looks like a sawhorse, doesn't it?
Well, that's what it started with.  A set of sawhorse brackets and a 2x4.


I found these brackets at Lowe's or Home Depot and they are for decks, I think, but they work OK here.  The top of this bracket is the only place nails were used.  A screw head would have stuck up more and made the cross board not lay as flat as it could.  Every where else we used screws or a carriage bolt.


See how the bracket sticks up higher than the 1x4 ?  I made sure the brackets were placed along the 2x4  where the shallow part of the door panels would be so it would lay flat.  If you used a thicker board, this would not be a problem.

My husband drilled two more holes in the brackets because the ones already there were too close to the edge of my boards.


I had planned to use carriage bolts with wing nuts with the saw horse bracket and the 2x4, but temporarily used screws just to hold it together while figuring out a few things.


The legs needed bracing so I attached a board across each leg.


This worked out really well.  I decided to use two boards on each set of legs in order to finish off the ends of the shelving boards.  There was another benefit to this because I did not have to attach the shelving boards.  They are just resting on the inside board and can be removed.  The outside board is higher and covers the ends of the shelving boards.  They were to also serve as bracing in that direction, so I might decide to screw them down if it needs it.

The height of the shelf was solely determined by the height up the legs where the width between the legs would exactly fit four 1x4s.  It worked out at a good height.


And here is the carriage bolt and wing nut attaching the 2x4 to the saw horse brackets.


Then I stained it.  Those inexpensive "white wood" boards do not look the best stained.  Ugly.  But, I'll look at it a while and if it bothers me, then I'll paint it.


I decided I wanted to set this hutch on top.  I bought it at an estate sale a while back.  So I had to rig something to make it more stable with all that weight on one side.


See those two narrow boards going down in the back?  I cut them a quarter inch MORE than the height of the bottom surface of the door because the carpet would press down.


Then I Velcro-ed the end to the bottom surface of the door so they would stay in place.


I also put felt sticky back things on the edge next to the wall.
You can already see a mark on the wall from me setting it up.


The jury is still out on those "beautiful" wood markings, but I am pretty sure it will stay as is unless I get an urge for some painting.


It just needs glass on top and a stool and I am also going to put stain on those brackets.
I plan to get a high swivel chair with a back.  It looks a bit high now, but I didn't want to cut the legs too short until I worked with it some.  I can shorten them later if need be.

It's not perfect, but I did it myself!

Amy

Not forgotten


I haven't forgotten about my inside goodies, I've just been all involved with outside things since spring (feels like summer) is here in Alabama.  My photography hobby time has been spent shooting things for my photo blog (and now I have yet another blog just for barns).  Now I'm hoarding blogs???  Oh, dear.

For anyone who visited my photo blog, "Amy's Photo Blog" it is no more.  I changed the name, and therefore, the site address, to Rose Street Reflections.
Please visit me there !

Amy

Wednesday, March 21, 2012

Liebster and Versatile Awards


Well, I might have trouble getting my big head through the door.

I have received two - yes, two - awards.

Many thanks to Candy and Deno!

My friend, Candy, at PICKIN and PAINTIN honored me with the Liebster Blog award!  Candy's blog features furniture make-overs that she does.  She also has a wonderful shop in Lawrenceburg, Tennessee that I love to visit.

A new friend, Deno, at What Do All These Buttons Do? sent me the Versatile Blogger Award.  He has great photos, many of which are HDR.

Please visit both of these blogs and the great blogs below that I have bestowed these awards to!


For the Liebster Award, I was supposed to choose 5 up and coming blogs which have less than 200 followers.  For the Versatile Blogger Award, the number of blogs I was to select was fifteen.
So I chose 15 blogs, at least five of which have less than 200 followers.  I think the point here is exposure for your blog, so we're good.

Since I combined these, each of you can choose which award you want to pass on.  Aren't choices great?

I don't like using the word "rule" on my blog, so here are the steps that make the blog award thing work best:

Liebster

  • Choose 5 blogs that have less than 200 followers
  • In a new blog post:    
    • Show your appreciation to the blogger who awarded you by linking back to them.
    • Link back to the blogs you are awarding so that everyone else can visit and enjoy their blog.


Versatile

In a new blog post:

  • Thank the person who gave you the award and link back to their blog.
  • Select 15 blogs/bloggers that you've recently discovered or follow regularly
  • Nominate those 15 bloggers for the Versatile Blogger Award
  • Finally, tell 7 things about yourself.


Here are my 7 things for the Versatile Award:
1.  Photography is my hobby.
2.  I do not like sports and if someone I'm fond of isn't playing, I won't be watching.
3.  I am very lucky in that my husband likes loves cooking.  Go for it, Dear.
4.  I collect rulers, clocks, flat carpenters pencils, wasp nests, santa mugs, sugar/creamers, and a multitude of other things.
5.  I like vintage things and many of my photos are of vintage things, either mine, or someone else's.
6.  I love cats.
7.  I like green, yellow, red, and robin's egg blue; birds, butterflies, lilies, irises, petunias.

Awardees:
Post either/both award(s) on your blog side panel to show that you won an award!

And, it's only blogging . . . if you do not want to participate for whatever reason, then feel free to ignore.  You don't have to email me, apologize, make excuses . . nothing.  Promise.


1. A Simple Country Life

2. Time Stand Still

3. Midlife by Farmlight

4. Treasures in Thrifting Land

5. In The Middle With Me

6. Snippets from Springdale

7. Ruth's Photo Blog

8. Kathy Goes a Ramblin'

9. CreativeMeAndLife

10.  simplify.daily.life

11.  playingwithmycamera

12.  Rural Ramblings with Ruta

13.  White Lace and Promises

14.  Mommy to a Princess

15.  Steadmans' Corner


Tuesday, March 20, 2012

Good for 5 cents


Do six photos make it worth six times more?
I got carried away.

Amy

Monday, March 19, 2012

Laundry Soap


Have you made laundry soap before?
I have been using it for several months now and I like it.
I use the diy Natural website for information on such things.


I used the finer side of the grater this time and like it better.


Although I didn't have any problem with the soap melting in the wash when I used the larger side of the grater, I like the tiny shavings better than those made with this side of the grater.


You can find many variations on the amounts of each ingredient, so it is not an exact science.
I used one bar of the Fels-Naptha soap, to about 1.5 cups each of Washing Soda and Borax.  I increased the Washing Soda and Borax because the Fels-Naptha bar seems bigger than other bars of soap.


About one tablespoon per load works well for me, however, I do not have a really dirty laundry.
No small children or sports players any longer.
I still use Shout for stains, or for a white item, sometimes I rub in a dab of the mixture and let set in a small amount of water.


Try a small batch.  You might like it and the effort is well worth the savings.

Amy

Saturday, March 17, 2012

Got Green?

Since I don't plan well for blogging,
(too much like work, and when blogging starts to seem like work to me, it's over)
I thought I would find a few green things around the house for today's post.


Can you tell I like green?

Happy St. Patrick's Day !!!

Amy